Laser Cutter - Epilog 24x12
Purpose
Section titled “Purpose”-
Award Engraving
-
Wood Engraving and Cutting
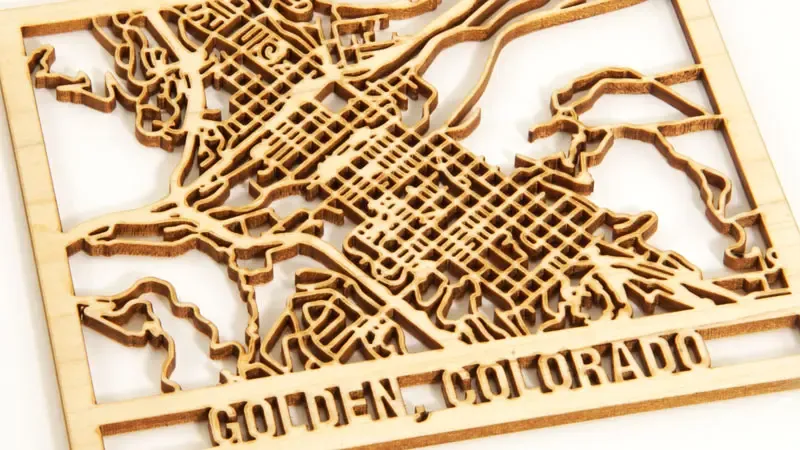
-
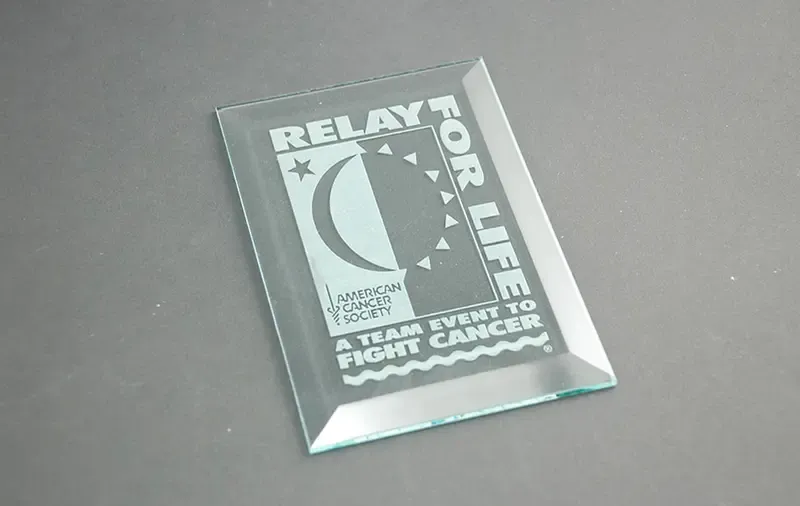
Glass Engraving and Etching

-
Acrylic Cutting and Engraving
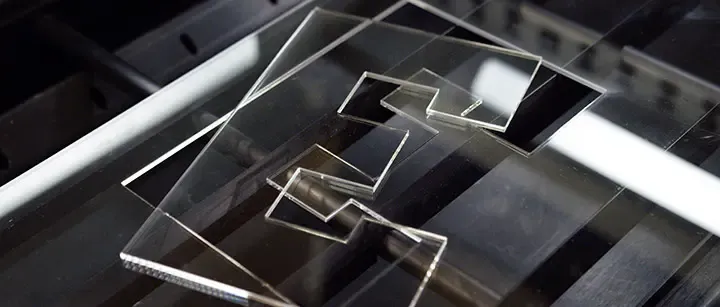
-
Metal Marking with a CO2 Laser
-
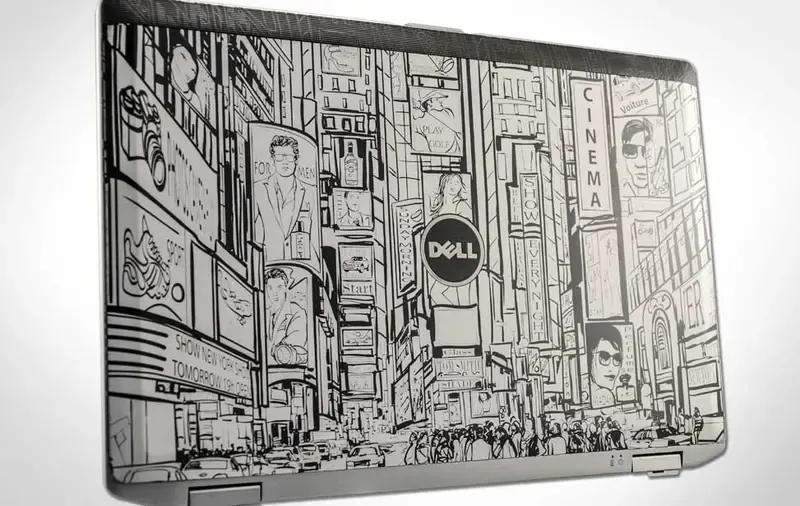
Personal Electronics Device Engraving
-
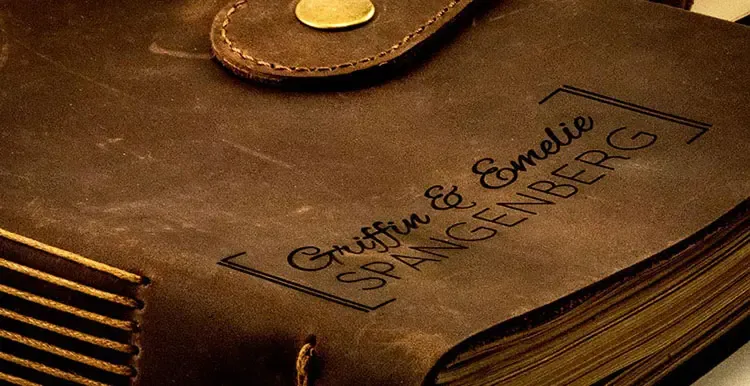
Fabric & Textiles Engraving
Minimum knowledge to use machine
Section titled “Minimum knowledge to use machine”- Raster engraving
- very high resolution dot matrix printing with a laser
- used to create highly detailed graphic images
- laser head scans back and forth, left to right, engraving series of dots one line at a time
- Vector cutting
- when you are vector cutting the laser is following a continous path that follows the outline of an image
- used to cut completely through materials
- you can vector cut with the laser by setting the outline to 0.025 mm, the thing outline will produce a vector cut
- Do not run the laser unvented
- Do not engrave or cut PVC
- Do not operate while unattended
- Do not oprate Exhaust/Filter motors until making sure your job is ready to be cut
- Turn off the Exhaust/Filter motors after cutting
- Software you can use :
- coreldraw
- inkscape
- autocad
- adobe illustrator
- check the inventory to know if there are any materials or not, if not you should get yours
Materials
Section titled “Materials”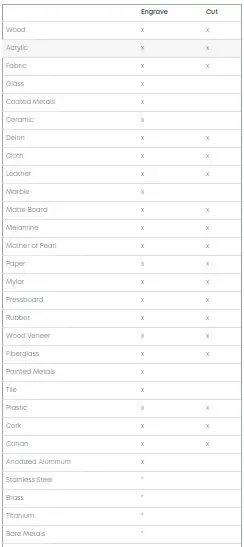
Working time
Section titled “Working time”- tuesday
- thursday
Maintenance
Section titled “Maintenance”- Weekly maintenance include cleaning the machine and check it’s functionality
- Yearly maintenance include cleaning the machine and internal parts, and replace faulty parts if nessary
- Aligning laser beam
Procedures
Section titled “Procedures”- Cleaning the plate area
- Remove the blate and clean the container under the plate
- Cleaning the rulers using glass cleaner spray
- using tooth brush also is useful in some cases when the tissue is not effective
- use many zip tie to clean the exhaust/filter path
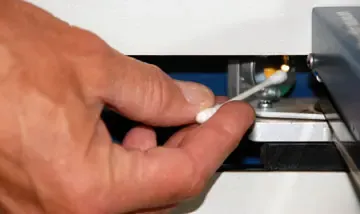
- clean the sensor using tissue, then using the alcohol and cotton
- clean the glass using glass spary cleaner
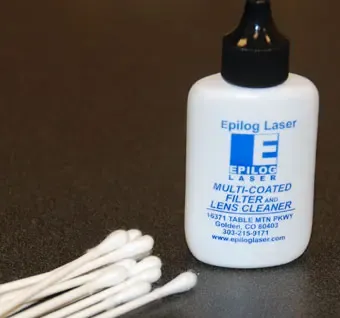
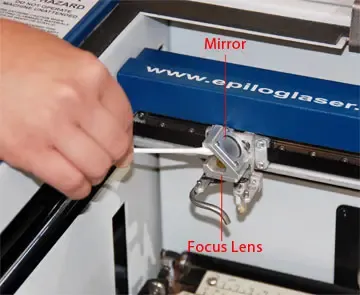
- Cleaning the optics
- clean the mirrors and lenses of the laser
- The two optical components most likely to require cleaning are the focus lens and the mirror directly above it
- never use alcohol or hardware grade acetone
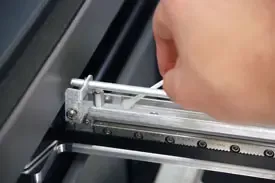
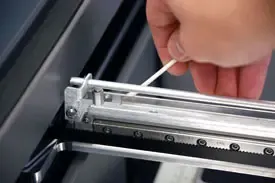
- Cleaning the X-Axis Linear Encoder Strip
- There are seven screws that attach the x-axis linear guide cover, Unscrew each of the screws until each one is loose enough to remove the linear guide cover
- You will not need to completely remove all of the screws to remove the cover
- The linear encoder strip is the clear plastic strip that runs along the width of the x-axis beam
- Using the cotton swab dipped in distilled water, wipe the cotton swab along the front and back side of the linear encoder strip to remove any smoke or dust debris that might have collected on the strip
Once you’ve finished wiping down each side of the encoder strip, go back with a dry cotton swab and wipe away any moisture that might have been left behind
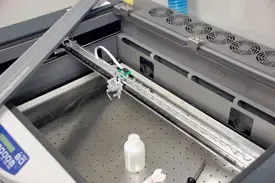
- Lubricate the x-axis (the long side) bearing rail, after cleaning the rail place about an inch long bead of epilog supplied grease into the top and bottom grooves of the x-axis rail
- clean the right side y-axis rail using soft cotton cloth, lubrication is not required
- Yearly maintenance
- sunday
1\9\2019hardware maintenance (cleaning, greasing) - monday
2\9\2019software maintenance (installing O.S and softwares) - test the machine
- sunday
advanced
Section titled “advanced”- Center engraving : this option has been designed to be used in conjuction with the x/y off feature on the control panel
- 3D Mode : When selected, instead of looking at the dots and detemining where to fire the laser based on the dot spacing, we look at the dots and determine how much laser power to apply to each do, allowing us to create a 3D effect
- Stamp mode : this function automatically inverts your artwork so that the background is engraved away while your text and graphic images are left standing
- Color mapping tab : the laser will use the settings assigned to each color
- landscape mode takes less time in raster than portrait mode
- it is better to raster so the laser cutting be in parallel to grain than it is perpendicular to it
- it is preferred to fix the job size according to the table size, and change the job position
stucki moderesults in more random pattern that looks more natural and pleasing to eye- a dithering is a great way to enhance your engraved products but it is very material dependant
- clip art modes
- standard : this is the default mode and will be used for most engraving jobs that include text and clipart
- brighten : this lighten the clipart this mode good for engraving photographs onto wood or marble
- photograph mode
- floyd-steinberg : this works well for some photo containg a great detail
- jarvis : produces a very nice looking pattern on almost all photos (300 DPI)
- stucki : the differences between jarvis and stucki are very subtle
- to reduce the cut time we can use color mapping order so that it can cut each color by its order
- to set a new home position
- turn on the laser beam
- press x/y off key then go
- move the carriage by hand
- press set home key
- try center-center engraving
- try page center feature of the shape that is not regular
- task plate : is general-purpose engraving table surface used for all projects that do not include vector cutting, it is good at engraving because it provides the mose even, flat engraving surface.
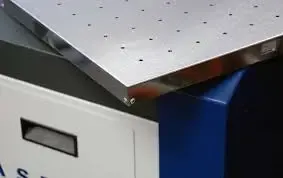
- vector cutting table : is used when you are cutting all the way through a material
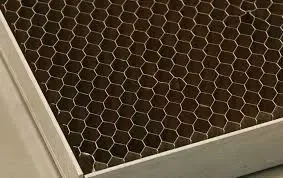
- if you have a piece of sheet stock that does not flatten out because it is not covering enough of the vacuum holes, you can use any material, to cover some of the exposed holes, simply blocking most of the vacuum holes will be enough to flatten most sheet stock as long as it is not too severely warped
- rim -drive rotary attachment
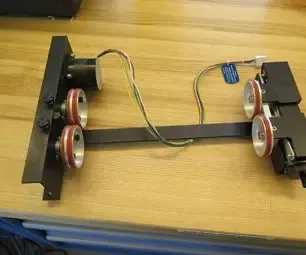 - it allows you to mark and engrave on cylindrical objects - how to use it? 1. lower the engraving table to it’s lowest point 2. turn off the power to the laser 3. flip the rulers and gaurds into their up position 4. remove the plate 5. remove the crumb tray, you will see three holes in the tray that mate to the three pins on the bottom of the rotary attachment, plug the attachment into the white connector 6. power on the laser, the engraver now knows that the rotary attachment is installed and changes its home position to a point directly above the center point of the drive wheels on the attachment - how to place the item? - the wheels on the left are the drive wheels which spin the cylinder, the wheels on the right are for support - the right side wheels are mounted on a scissor jack so they can be raised or lowered to level the top surface of your cylinder - in most cases you will want to loas your cylinder with the larger diameter on the left - load your cylinder onto the rotary attachment so that it is just touching the black bumper - use the clamp to hold the glass in place is optional - if your clyinder is not horizontal to the x-beam the laser will lose focus as the carriage head moves across the job - how to set the focus - the auto focus feature works with the rotary attachment - to manually focus your item - place your cylinder on the rotary - place the focus gauge on the lens carriage and set the focus - if you want to move the focus gauge to a different area of the cylinder, press the x/y off key, then go key to move the laser carriage to the point where you want to focus the laser, then press the focus key and use the up and down arrows to bring the table to the correct height